There are some desserts that don’t need fancy techniques or expensive ingredients to steal the spotlight. Mama’s Banana Pudding is one of those timeless classics — creamy, sweet, nostalgic, and always the first dish to disappear at family gatherings. This is the kind of dessert that tastes like love, memories, and Sunday afternoons in one spoonful.
Below you’ll find a very detailed, long, and complete version of the recipe, with tips, variations, and secrets to make it absolutely unforgettable.
Ingredients
- 1 box (3.4 oz) vanilla instant pudding mix
- 2 cups cold milk (whole milk gives the creamiest result)
- 1 can sweetened condensed milk
- 1 teaspoon vanilla extract
- 1 container whipped topping (Cool Whip), thawed
- 4–5 ripe bananas, sliced
- 1 box vanilla wafers
Step-by-Step Instructions
Step 1: Prepare the Creamy Pudding Base
In a large mixing bowl, pour the cold milk and add the vanilla instant pudding mix. Whisk continuously for about 2 minutes, until the mixture thickens and becomes smooth with no lumps.
Next, slowly whisk in the sweetened condensed milk. This is where the pudding becomes rich, silky, and deeply flavorful. Add the vanilla extract and mix again until everything is perfectly combined.
Let the pudding rest for 5 minutes. This short resting time allows it to set properly and develop a smoother texture.
Step 2: Fold in the Whipped Topping
Once the pudding has slightly thickened, gently fold in the whipped topping using a spatula. Do this slowly and carefully — don’t stir aggressively. Folding keeps the mixture light, airy, and cloud-like.
At this stage, your pudding should be:
- Creamy
- Fluffy
- Smooth
- Slightly glossy
Taste it. This is the heart of the dessert.
Step 3: Prepare the Bananas
Slice the bananas into even rounds, about ¼ inch thick. Make sure the bananas are ripe but not mushy — they should be sweet, fragrant, and hold their shape.
If you want to prevent browning, you can lightly brush the banana slices with a tiny bit of lemon juice, but this is optional.
Step 4: Assemble the Layers
Choose a glass dish, trifle bowl, or deep serving dish.
First layer:
Cover the bottom with a single layer of vanilla wafers, slightly overlapping them.
Second layer:
Add a layer of banana slices on top of the wafers.
Third layer:
Spread a generous amount of the pudding mixture over the bananas, smoothing it out evenly.
Repeat the layers:
- Wafers
- Bananas
- Pudding
Continue until all ingredients are used, finishing with a thick, smooth layer of pudding on top.
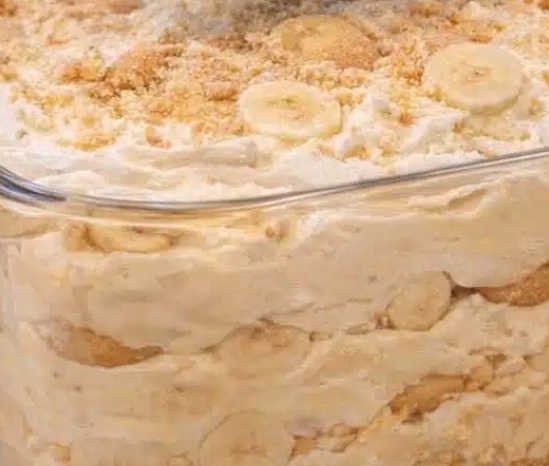
Step 5: Final Touch
Crush a few vanilla wafers and sprinkle them over the top for a classic finish. You can also add:
- Whole wafers for decoration
- Banana slices right before serving
- A light swirl of whipped topping
Chill & Set (Very Important)
Cover the dish with plastic wrap and refrigerate for at least 4 hours, but overnight is best.
This resting time allows:
- The wafers to soften into cake-like layers
- The flavors to blend beautifully
- The pudding to set perfectly
The longer it chills, the better it tastes.
Serving Tips
- Serve cold
- Use a deep spoon to get all the layers in one scoop
- Perfect for family dinners, potlucks, holidays, or just because
Variations You’ll Love
- Extra Banana Flavor: Add a thin layer of mashed banana into the pudding
- Southern Style: Add a layer of homemade custard instead of instant pudding
- Chocolate Twist: Use chocolate wafers or drizzle chocolate sauce between layers
- Individual Cups: Assemble in small glasses for parties
Why This Recipe Is So Special
This banana pudding isn’t just a dessert — it’s comfort food. It’s easy, reliable, and always impressive. No baking, no stress, just pure creamy goodness that tastes even better the next day.